

Spring is here and it’s time to get planting. There are many ways to fill your garden with verdant, fruitful beauty. Direct sowing is one of the simplest, lowest-input (and low budget) ways to grow vegetables. In the right circumstances, it has lots of advantages over growing or buying transplants. Plus there’s something timeless and fulfilling about putting seeds directly into the earth.
What Crops Do Well with Direct Sowing?
If you live in a warm climate with a long growing season, almost everything can be sown directly. In cooler climates with shorter seasons, some crops need a head start indoors in order to bear fruit. Examples of these are tomatoes, chilis, peppers, and eggplant.
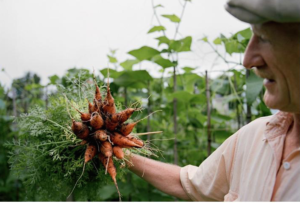
There are certain plants that generally do better when direct sown, regardless of the climate. This is mostly because they have delicate roots that don’t appreciate being disturbed. The most common of these are:
- Carrots
- Beets
- Radishes
- Turnips
- Parsnips
- Beans
- Peas
- Corn
- Spinach
Other kinds of vegetables that can perform well with direct sowing, but are often planted as transplants are:
- Winter squash and pumpkins

- Zucchini and summer squash
- Cucumbers
- Basil
- Cilantro
- Chard
- Lettuce
- Fennel
- Onions/scallions
- Dill
- Kale
- Cabbage
- Arugula
- Okra

 To learn how to grow all of these, plus more vegetables, check out our Online Gardening School
Advantages of Direct Sowing
As we mentioned above, direct sowing is timeless and low-input. There are other advantages of this method of starting seeds too:
- No need to buy seedling mix, flats, heat mats or lights – or own a greenhouse
- Seeds are incredibly cheap in comparison with transplants (baby plants in pots)
- When seeds germinate, they send a root down toward the center of the Earth; direct sowing allows natural root growth to happen unhindered by a wall of plastic or wood in a flat or pot.
- Low-vigor (wimpy) seeds might not make it in a direct sowing scenario (compared with being babied in a greenhouse), which automatically culls weaker plants
- The moist earth holds water for longer than tiny amounts of seedling mix in flats or pots; direct sowing decreases the chances of your seedlings drying out if you forget to water for a day
Challenges of Direct Sowing
Even though it’s beautifully simple and has lots of advantages, direct sowing is not without its challenges. It’s important to consider your particular growing conditions, along with the specific crop in question, as you’re deciding whether or not to direct sow. There are some circumstances when direct sowing is not the best option:
- All seeds have an optimal temperature range for germination. If your soil doesn’t warm up into that range, your seeds won’t germinate. See the chart for temperature ranges for several common veggies.
 Chart source: Gardener’s Supply Company
- Rough or rocky soil can be hard to prepare into a welcoming seedbed. In order to germinate and thrive, seeds need good soil contact. Moving through the soil (up to the sunshine and down into the earth) needs to not be a big struggle.
- Heavy weed pressure can make it difficult for seedlings to thrive. If you know that your garden soil is full of vigorous weed seeds that will grow faster than more tender, slower growing veggies, direct sowing might not be a great choice.
- Final spacing of your plants is harder to determine with direct sowing. You can’t be sure of the germination rate you will get, so your sowing might end up patchy. It is common to sow heavily and then thin when direct sowing.

How to Direct Sow in 5 Steps
If you’ve decided that direct sowing is for you, here’s how to do it in 5 simple steps:
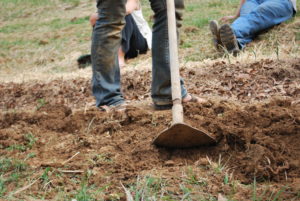
1 – Prepare your seedbed. Make sure that the top 8-12 inches of your soil are loose and fluffy. You can do this by digging, plowing, or if you’ve been tending your garden for some years and using mulch, just raking away the mulch to reveal a beautiful, soft, open palate. After loosening, run a rake over the bed to smooth out its surface and remove any debris such as rocks or roots.
2 – Decide on a planting pattern and mark it out. Three of the most common ways to plant are in rows, in a honeycomb pattern, and broadcast or scattered. Depending on the crop and your overall management, one of these styles will be the right choice for you. For rows, it can be helpful to scratch a furrow or run a string to mark the row so that you stay on it while sowing. Some people use planting jigs for honeycomb patterns.
3 – Sow seeds. Depending on the area you are planting, this can be done by hand or with a device. Rolling, walk-behind seeders and jab-style seeders are available for larger gardens and farms. Seeding devices can be homemade too. Sowing depth depends on the crop you are working with, and ultimately on the size of the seed. A general rule of thumb is to plant to a depth of 2x the width of the seed. Some seeds, however, need light to germinate, so check on your seed packet for specific information. For great seed sources, check out our list of Independent Seed Companies.
4 – Cover seeds. Good soil contact is crucial for germination. It also means that your seedlings won’t get dried out easily once they germinate. With you hands or a hoe, cover the seeds completely with soil (unless they are light-dependent germinators). Tamp the soil down gently. Walk-behind seeders do this step automatically!
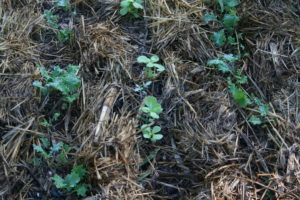
5 – Thin to desired spacing, and weed. Once your baby plants are up, thin out enough of them so that you’re left with optimal spacing. Keep up with weeding right from the start so that your crops don’t have to fend off competition from too many vigorous neighbors.
 On Facebook
 On Instagram