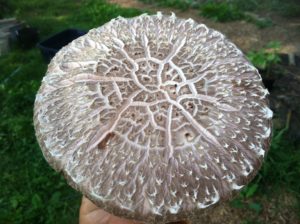
They’re delicious, healthful, beautiful and fascinating, so we’re going to teach you the basics of how to grow mushrooms.
There are many kinds of mushrooms (over 10,000 known!) that live in all kinds of habitats, including wild mushrooms and cultivated ones. Here we’ll focus on general cultivation strategies for decomposers of wood, including shiitake, oyster, reishi, lion’s mane and turkey tail. These kinds of mushrooms can be grown on inoculated logs.
To learn more about how to grow mushrooms and how fungus can fit into your garden or homestead, join us for our Immersive Permaculture Design Certificate Program and get hands-on experience.

The basic steps for growing mushrooms:
- Obtain mushroom spawn (fungal tissue in a carrier medium, usually sawdust) and tools
- Harvest logs to inoculate
- Drill holes in logs
- Fill holes with mushroom spawn
- Seal the holes with wax
- Set logs in a place they will stay moist
- Wait for colonization of logs by spawn
- Harvest and enjoy your mushrooms!
While the process is pretty simple and easy, there are some important considerations. We’ll elaborate below on how to grow mushrooms on logs using sawdust spawn or plugs.
How to Choose and Harvest Logs for Growing Mushrooms
Different kinds of mushrooms prefer to decompose different kinds of trees. Oak is the most widely used variety of tree for shiitake cultivation. Others such as sweet gum, sugar maple and beech are all suitable. Sometimes it makes sense to decide which kind of mushroom to grow based on what kinds of trees you have at hand. Instead of “how to grow truffles?” you may need to explore “how to grow mushrooms on tulip poplar trees?” Field and Forest Products, Inc. has a handy tree species chart of both suitable and unsuitable trees for different kinds of mushrooms.
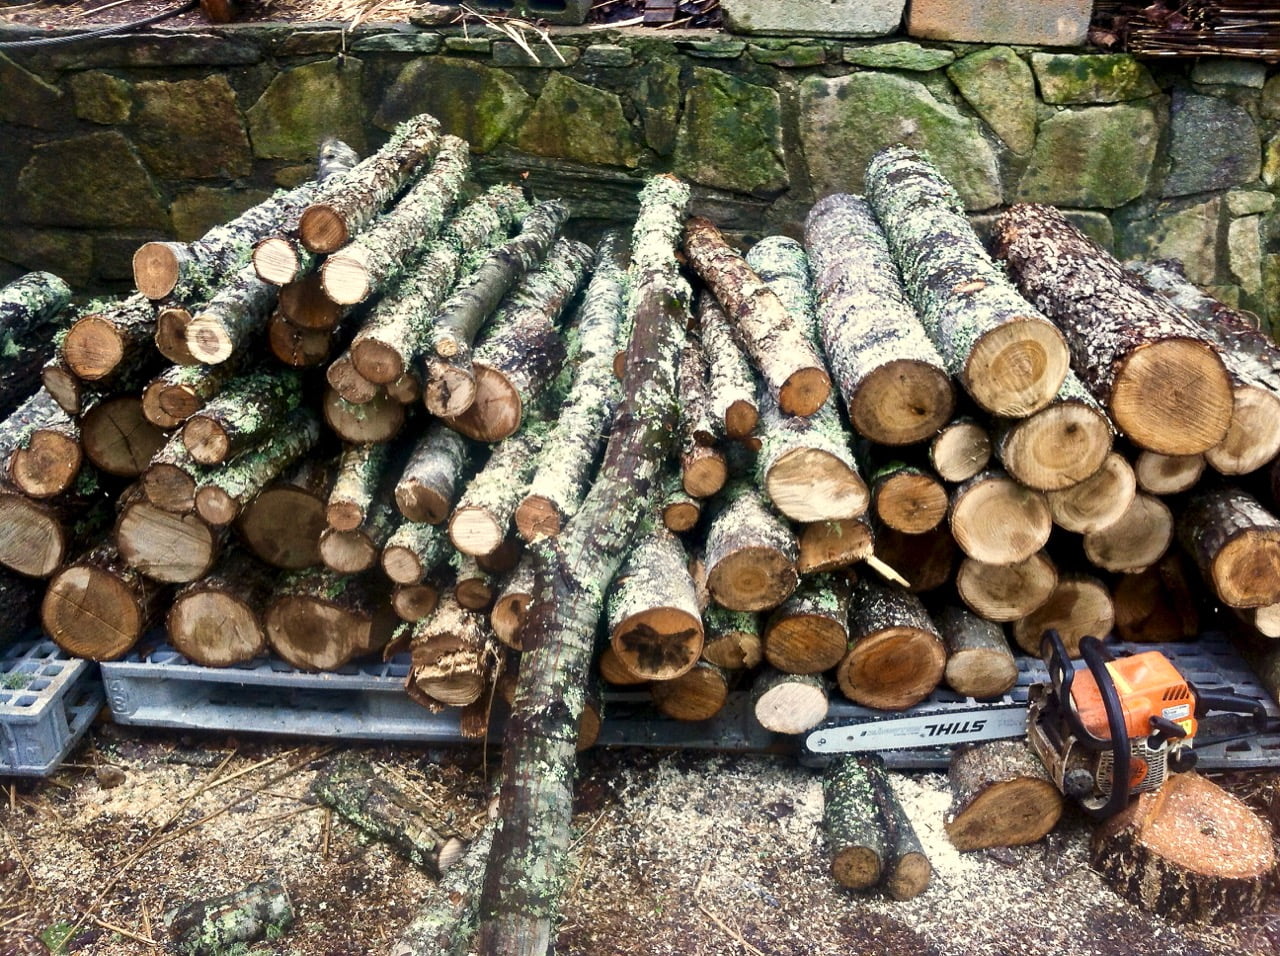
Cut trees that will become mushroom logs when they are dormant. This means not even any tiny buds. As soon as buds appear, even tiny ones, both water and sugar are mobilized, leading to less ideal conditions for your mushroom logs. The range of diameter that works best for log inoculation is between 4″ and 8.”
It’s important to handle mushroom logs gently. You aren’t harvesting firewood! Be careful not to damage the bark. It is needed both to maintain moisture and to protect your log from being colonized by competitive wild fungus.
Logs should be cut to 3′ to 4′ in length. After cutting, let the logs sit in a cool, dark, damp place for 2 to 4 weeks before you inoculate. You can cover them with a tarp and/or spray them periodically with a hose if such conditions aren’t otherwise available.
How to Grow Mushrooms Using “Spawn”
When your logs are properly “cured,” it’s time to inoculate them with mushroom spawn. Contrary to what some might think, you don’t inject or dust logs with spores (which are the fungal equivalent of seeds). Rather, you use living mycelial (fungal) tissue on a nutritive substrate…a.k.a. “spawn” (like a cutting or tuber, if you’re talking plants). Growing mushrooms from spores is an entirely different process, beyond the scope of this post.
You can purchase mushroom spawn in a variety of different forms and on a variety of different substrates. For log inoculation, your two options are “sawdust spawn” and “plug spawn.” The former requires a special tool to insert it properly into logs; the latter does not. As you might guess, sawdust spawn is much cheaper than plug spawn. Your choice will probably depend on how serious you are about growing mushrooms and how many logs you plan to inoculate.
Drilling and Filling Holes in your Logs
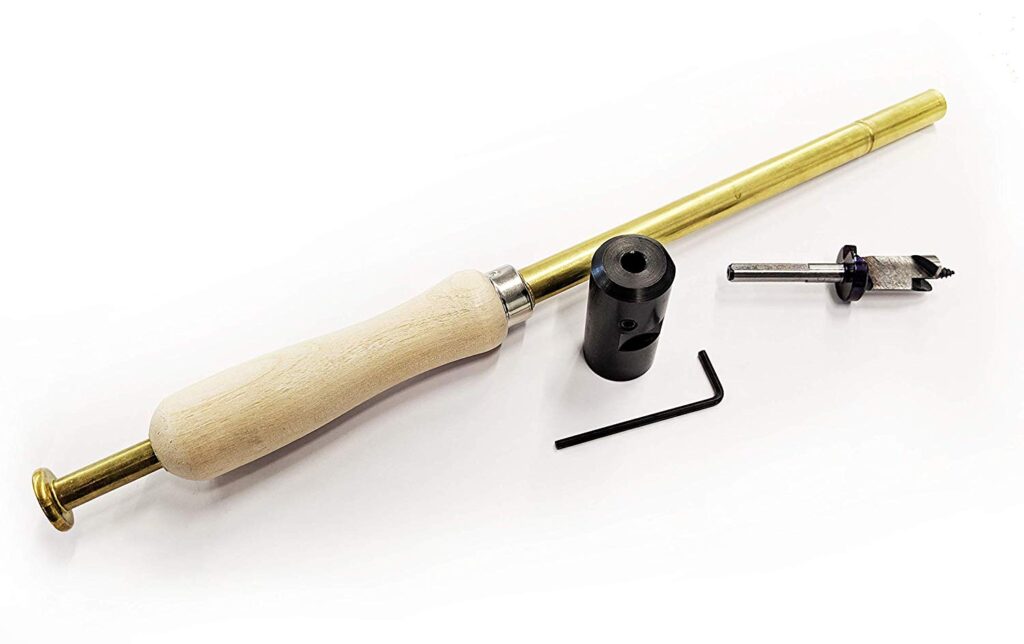
Whichever kind of spawn you choose, your next step will be to drill holes all over your logs to insert the spawn. These holes should be at a particular density, width and depth depending on the kind of mushroom you are growing. If you are just doing a few logs, it can work to wrap tape around the appropriately sized drill bit at the correct depth. There are specialized bits with built-in stops if you plan to do lots of logs. Adapters are also available to enable you to use an angle grinder instead of a drill to make your holes. This is much faster, more ergonomic, and well worth it if you plan to cultivate a lot of mushrooms.
Once your holes are drilled, it’s time to fill them with spawn. Either use the tool you’ve acquired for sawdust spawn or gently hammer in your plugs.
Sealing the Holes with Wax
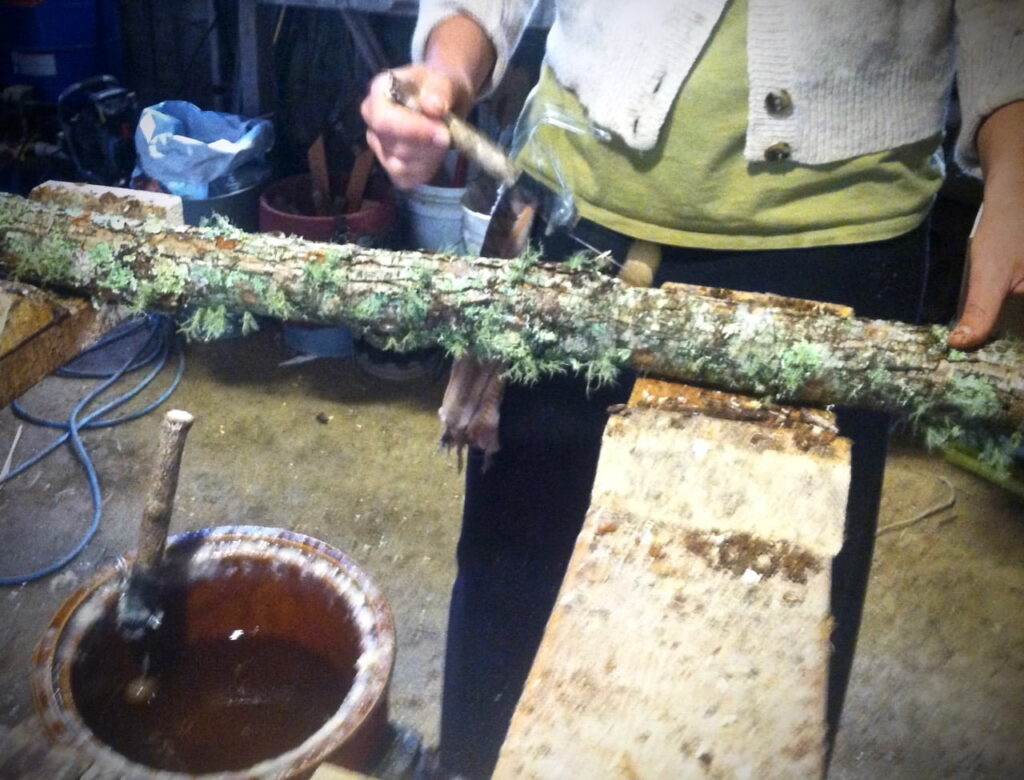
Once your logs are plugged (this term is used whether you are using sawdust spawn or pre-made plugs), it’s time to seal over each hole with wax. This is important to keep the spawn moist as the fungus begins to colonize the log. Wax also protects the open hole from being colonized by other kinds of fungi. Most people use cheese wax for this purpose, which is a food-grade, paraffin-based wax. Soy-based waxes are also available that will work. Straight beeswax is too brittle and cost-prohibitive, plus bugs will eat it.
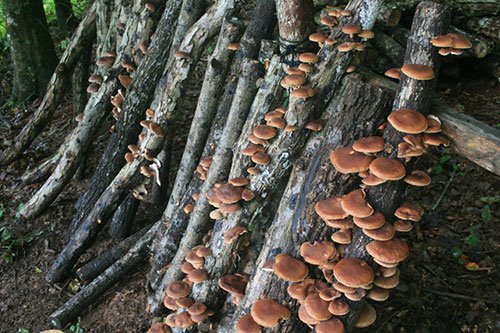
Colonization and Fruiting of Mushroom Logs
After waxing, your logs are ready! The next phase is colonization of the logs by your selected fungus. Conditions that allow this are always moist, and often warm, depending on your particular variety of mushroom. The spawn migrates out of the hole that you filled and into the log. Once the log has been fully colonized, it is ready to bear “fruits,” or mushrooms. This can happen the same year that you inoculate, or, more commonly, the next year. Fruiting only happens under the right temperature and moisture conditions, which vary from species to species and even within species among varieties. For example, there are warm-weather and cooler-weather fruiting shiitakes, allowing for a longer harvest period.
The Tasty Rewards of Growing Mushrooms
 When mushroom logs fruit, it usually happens in “flushes.” This means one day you may walk out to the nice shady spot where you stacked your logs, and every log will have sprouted tiny mushrooms along its length. This is is very exciting. Each day these baby mushrooms will grow (unless temperatures go below freezing), until they are ready to harvest.
Logs can bear mushrooms for several years, depending on their diameter and the vigor of the particular kind of mushroom. After the initial work of inoculating logs, mushroom cultivation is mostly about preventing them from drying out and experimenting with mushroom recipes to utilize your abundant harvest!
Books About Growing Mushrooms
Note: If you want to find these items locally, more power to you! If you’re going to buy them online, we participate in an associate program with Amazon.com. When you click on the links below, we benefit (at no extra cost to you). Income from this program goes into a fund that helps us continue offering free information and resources to everyone.
Growing Gourmet and Medicinal Mushrooms by Paul Stamets
Organic Mushroom Farming and Mycoremediation: Simple to Advanced and Experimental Techniques for Indoor and Outdoor Cultivation by Tradd Cotter
Radical Mycology: A Treatise On Seeing And Working With Fungi by Peter McCoy