
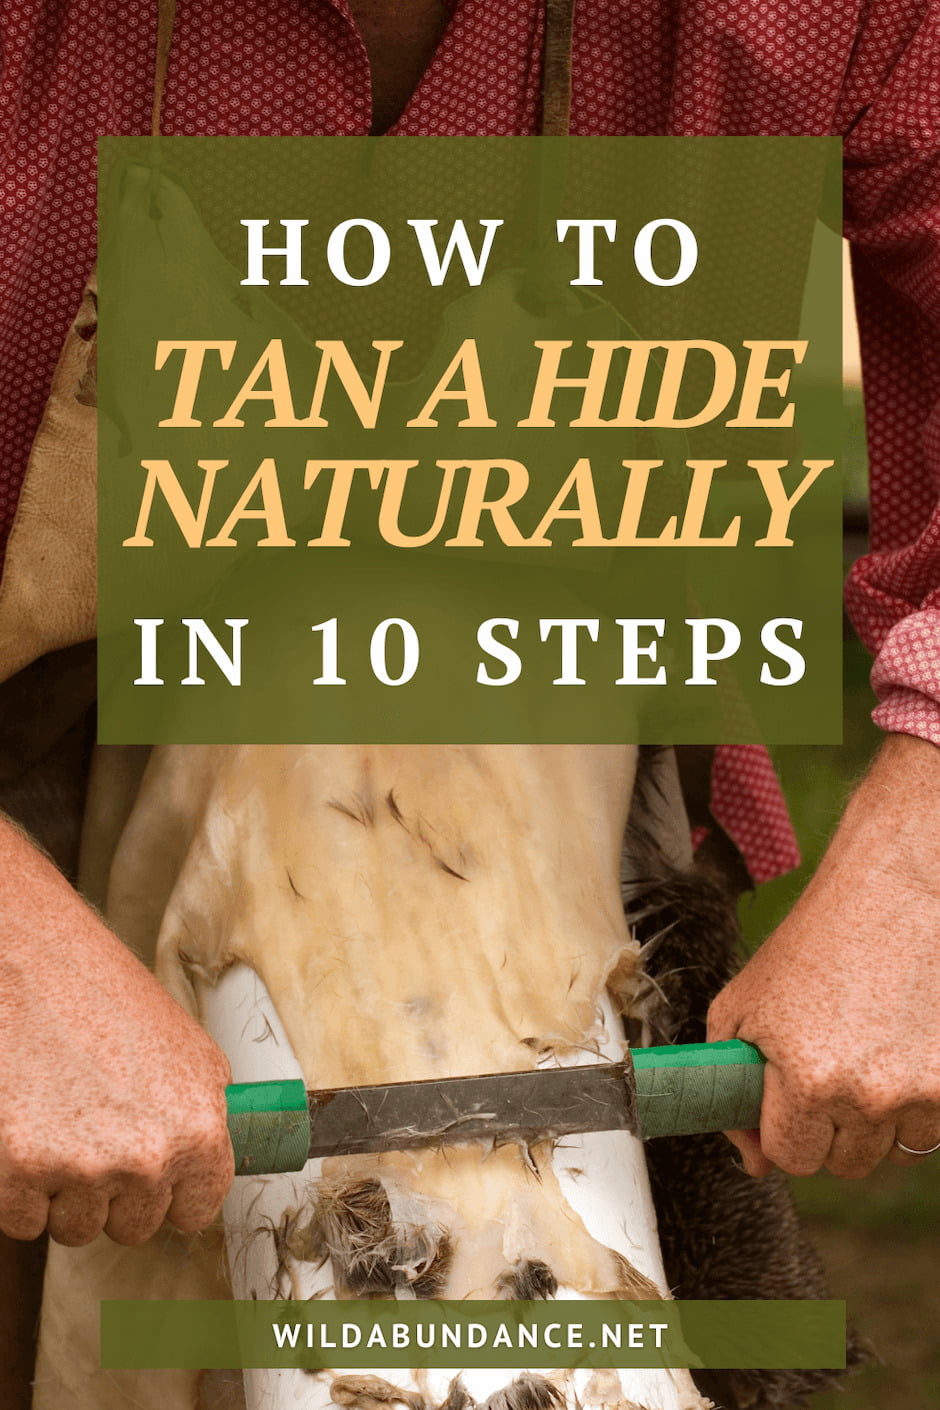
So, you’ve gotten your hands on a deer skin and you want to turn it into leather. This is an exciting moment! This guide is designed for anyone curious about how to tan a deer hide naturally, whether you’re a beginner or already familiar with tanning hides using traditional methods like brain tanning. We’re going to walk you through how to tan a hide, naturally, in 10 steps with the wet-scrape brain tanning method.
Using all natural materials and getting a hide velvety soft and pliable is a lot of work. We’ve been turning animal skins into supple, eminently useful buckskin for fifteen years, and we’ve got the muscles to prove it!
You’ll find other “how to tan a hide” resources out there that claim it’s easy. Don’t believe them. They are imposters. Brain tanning is, however, incredibly rewarding and we’re excited to teach you about it.
The whole process will take you a few days, so be prepared. From understanding how to tan a hide without chemicals to mastering how to brain tan a hide for long-lasting buckskin, each step brings you closer to learning this ancient, sustainable craft. It will also be somewhat messy and stinky.
For a more complete run through of hide tanning, join us for our comprehensive Online Hide Tanning Course.
Overview of how to tan a hide, naturally, by brain tanning
- Evaluate the hide and trim off edges
- Remove the flesh
- Soak in water or a bucking solution
- Scrape off grain and membrane
- Wring out moisture
- Apply braining solution
- Wring hide
- Repeat braining and wringing
- Soften your hide
- Smoke to preserve softness
Curious about our Online Hide Tanning Course?
We’ll let you know when classes open for registration, and send you our fun and informative newsletters.
Materials you’ll need for brain tanning
- Deer hide: fresh, salted, frozen or dried
- Scraping beam made from a scraped and smoothed hardwood log, or a piece of PVC pipe with some sort of propping device
- Scraper: an old, dull planer blade works well. Make handles for it with pieces of hose or fabric wrapped with duct tape.
- A large garbage bag and belt or rubber apron
- One plastic bucket
- A good sharp knife (We prefer carbon steel as it is easier to keep sharp)
- Brains: one deer brain is just enough, but more is better. If you buy pig brains, get one pound. A dozen egg yolks will work in place of the brains, but brains are slightly superior.
- Fat: ¼ cup olive oil or rendered bear fat
- Staking post
- Cable: 5 feet of ⅛ inch steel cable and 2 cable clamps
- Three beading needles and beading thread
- Wringing beam: a pole lashed to 2 trees works well
- Wringing pole: a smooth strong stick of very hard wood 2-3 inches in diameter and 3-5 feet in length; broken tool handles work well for this.
- Punky (half-rotten) wood: 5-15 gallons of evenly punky wood, or a combination of punky wood and fir boughs.
- Your arms: strong, or ready to become strong
Preparing your hide for tanning: Evaluating, Trimming, Fleshing and Soaking
The first four steps we listed above prepare your hide to be worked. Begin by evaluating and trimming. Learning how to tan a hide is a lot of work, and it doesn’t make sense to undertake this effort if you’re starting out with a poor-quality hide. Examine the hide for any holes. Lacerations that don’t go all the way through the hide can become holes later. Look out for knife marks that penetrate into the gray layer between the flesh and skin. Unless all you want to make is lashing, a holey hide is not ideal.
Next, trim off any dangly bits and the very thickest part of the neck. These areas can be hard to work and it’s best to just get rid of them right off the bat.
Fleshing
Once your hide is deemed worthy and has been trimmed up, it’s time to flesh. Spread your hide on the beam, making sure it’s flat and not folded. We show you exactly how to make a scraping beam in our online hide tanning class. Scrape a small area at a time with your scraping tool to remove all of the flesh. his is one of the most important steps in natural hide tanning and helps set the stage for the grain and membrane removal that follows.
Watch the videos below for more detailed instruction on making your own fleshing tool, and the process of fleshing a hide
Learn to Tan a Hide Today!
Online Hide Tanning
Soaking
Soaking a hide after fleshing is a process of controlled rotting. It loosens the hair and softens the membrane layer, which will be the next part you scrape off. You can either soak your hide in a creek (tied to a large rock or tree so it doesn’t float away), or a bucket with a rock to weigh it down. This soaking phase is essential for those learning how to tan hides naturally, as it prepares the skin for effective dehairing.
If you’re using a bucket, be sure to agitate the hide a couple of times a day. The soaking process will take between 2 days and a couple of weeks, depending on the temperature of the water. It’s done when you can easily pull the hair out of the hide with a firm tug.
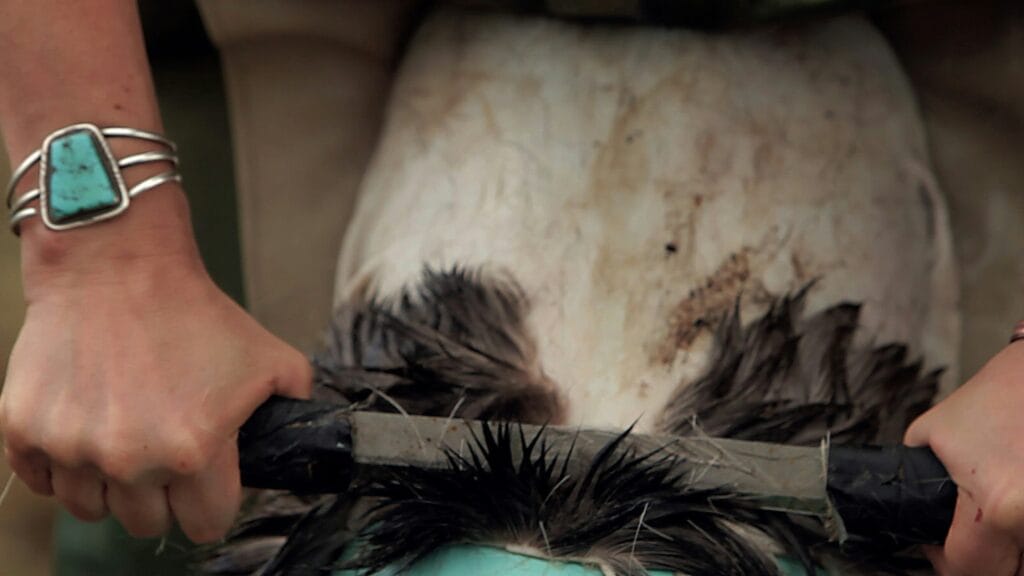
Getting ready for your brain tanning solution: Scraping, Membraning, Wringing
Here’s where the hard work begins! Animal skins have layers of different kinds of tissues above and below the thick part we turn into leather. Beneath the hair (which you will scrape off too) is a layer of grain that holds in the hair. This needs to be removed. It can be very tricky to get all the grain off as it is quite well attached to the hide and very hard to see. It’s best to learn about this visually, which is one of the reasons we created the Online Hide Tanning Course. So, if you try this step and find it difficult, consider signing up for much more specific and detailed instruction.
Using a careful, methodical approach is most likely to yield success. Scrape a small area at a time, with a good amount of force. We like to start scraping in the middle of the hide. It’s easiest to remove the grain if you scrape from an area with no grain (that you’ve already scraped) into an area with the grain still attached. As you learn how to tan a hide, this part of the process will become more clear, but not necessarily physically easier.
Watch the video below for more instruction on scraping.
Now’s one of your chances to take a break, if you like, because you can dry and store a hide at this stage. If you’re getting tired, the weather’s bad, or it’s just taking longer than you expected, dry your hide and roll it up for later.
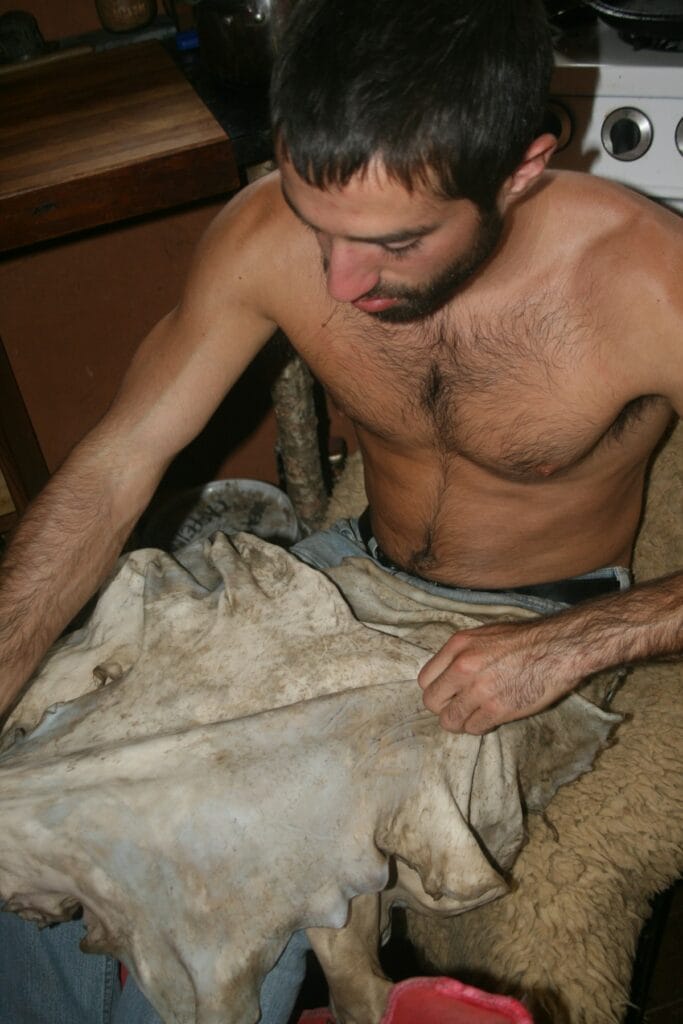
Membraning
Whether you’ve dried your hide or ploughed on through, after scraping, it’s time to membrane.
Rehydrate a dry hide before this step. Using the same methodical approach, but way less force and meticulousness, scrape the other side of the hide to remove the membrane. It’s the meat side that used to contain the deer’s innards.
Wringing
Now wring out as much moisture as you can. You don’t want a crunchy, bone-dry hide. But neither do you want a dripping hide with dark, wet spots. It should be Goldilocks dry: soft and pliable, but just barely damp.
Brain tanning: Soaking your hide in brains, and Softening
It’s time to get down with the brains of this operation. Real brains. The fat and lecithin in brains make them ideal for creating your “tanning” solution. If you don’t have brains, you can always use egg yolks. They also have fat and lecithin, but don’t quite have the magic or grossness of brains. Here’s our recipe:
- 1-½ gallons hot water (not so hot that it will burn your skin)
- 1 deer brain, or 1 pound of another kind of brains, or 12 egg yolks, whisked or blended into very small particles
- ¼ cup olive oil, other oil, or rendered bear fat
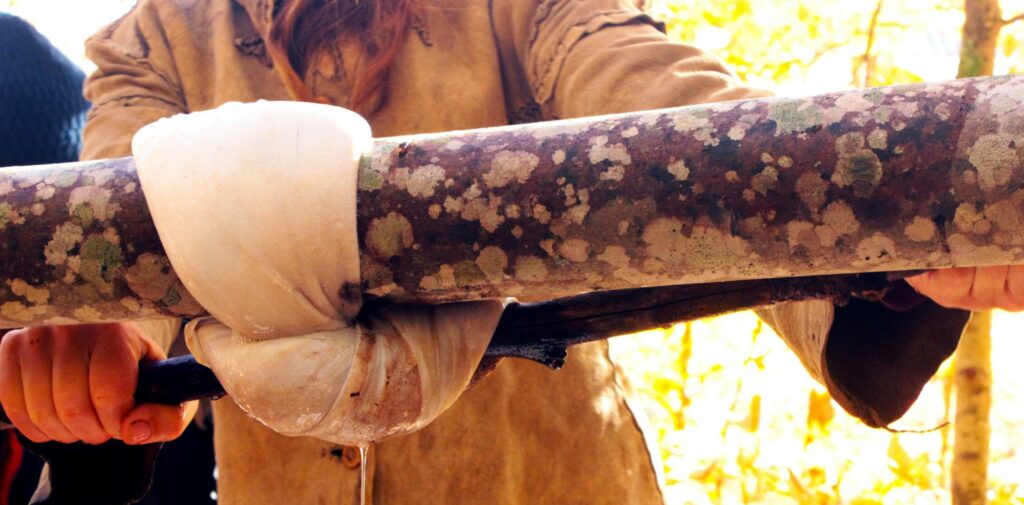
Submerge your hide in this warm, oily solution and stir it around a bit to make sure the whole hide is saturated. Let it soak for a minimum of 15 minutes and as long as overnight (or somewhere in between). Then pull it out, hand wringing it to leave as much of the solution in the bucket as you can. Now, place your hide over the wringing pole and twist it up in a donut (for a more detailed description of this step, join us for the Online Hide Tanning Course).
Next, wring it out on the wringing pole, then soak it again, wring it again, soak it again, wring it again…Do this 2-4 times, depending on your stamina, how big and thick your hide is, and what sort of mood you are in. The goal is to get the brain solution to penetrate through the whole hide.
Softening
After braining comes softening. This is another labor intensive part of hide tanning. In order to avoid your hide becoming hard like rawhide, you must keep the fibers moving throughout this final drying. Begin by stretching the hide as though you were trying to pull it apart from side to side. Then try to pull it apart lengthwise. Don’t forget the edges!
Throughout the softening process you can stretch, cable, stake, bounce, rub, and smack the hide. These might sound like sexy dance moves. They’re actually different techniques to keep those fibers moving as the hide dries. To see videos that demonstrate and explain each of them, join our Online Hide Tanning Course.
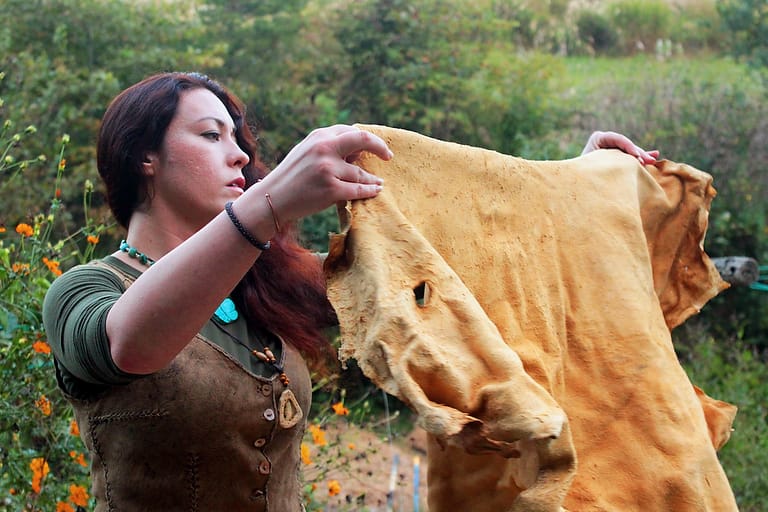
Smoking your hide to preserve all your work
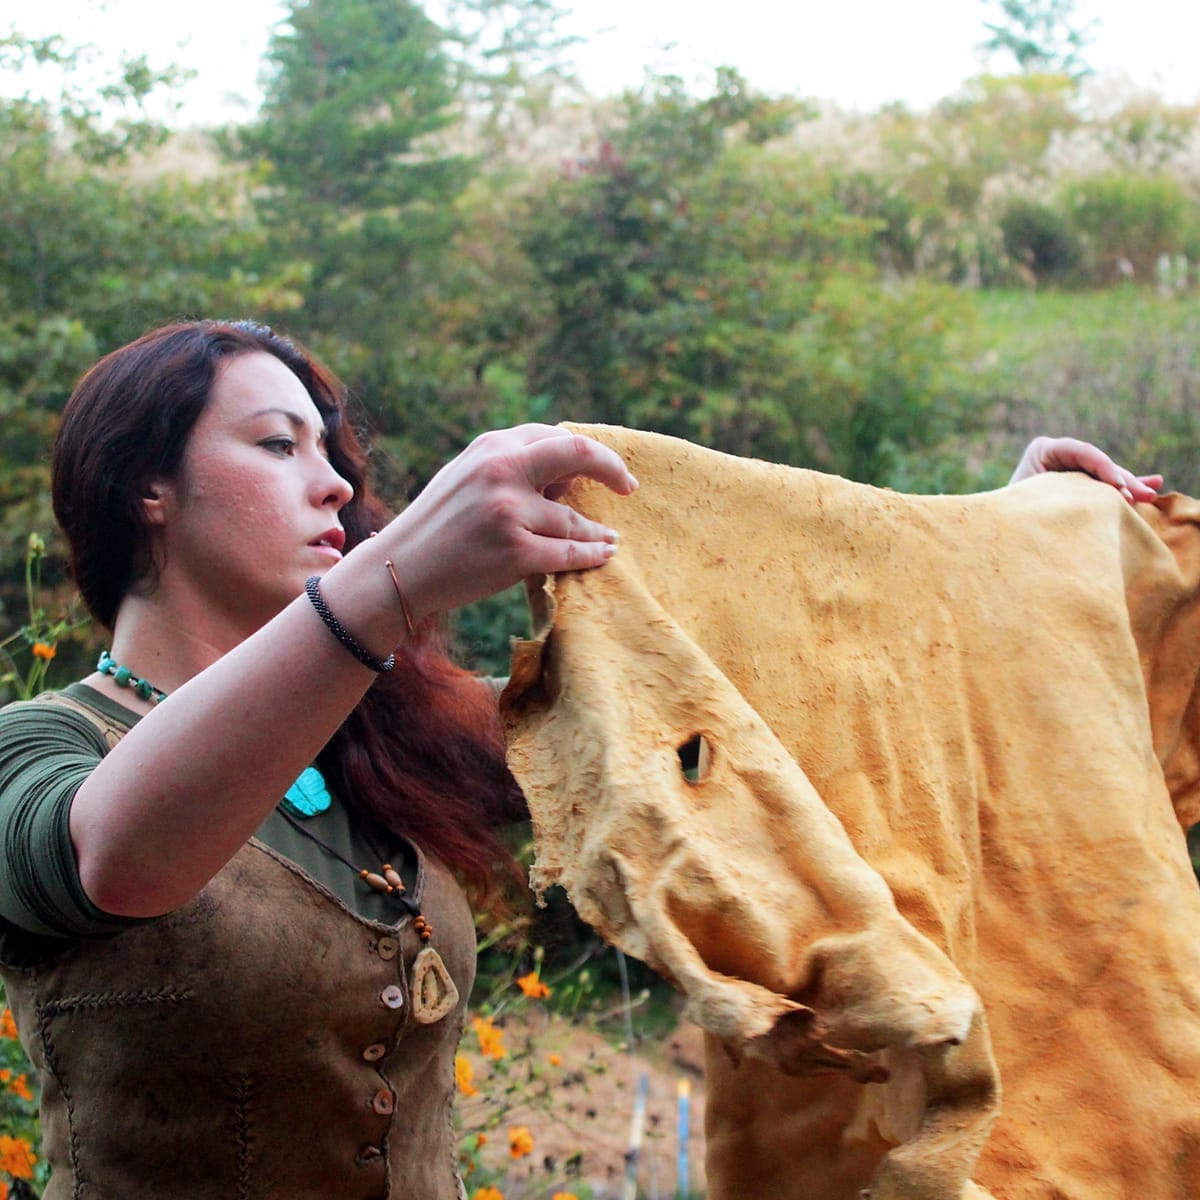
When your hide is completely dry (and soft), it’s time to smoke. Your hide, that is. This is the final step to make buckskin that will stay soft in all kinds of weather. While your white hide may seem beautifully soft before smoking, it will become stiff and hard again as soon as water touches it. Keeping it soft is why you smoke it, and smoking will also turn your hide into a lovely amber color.
First, turn your hide into a pouch with one open end at the neck (temporarily), with the side that used to have hair on the inside. Use glue, staples, or stitching to do this. Then extend this pouch with a tube made of cloth that will fit snugly over the outlet of your smokey coals.
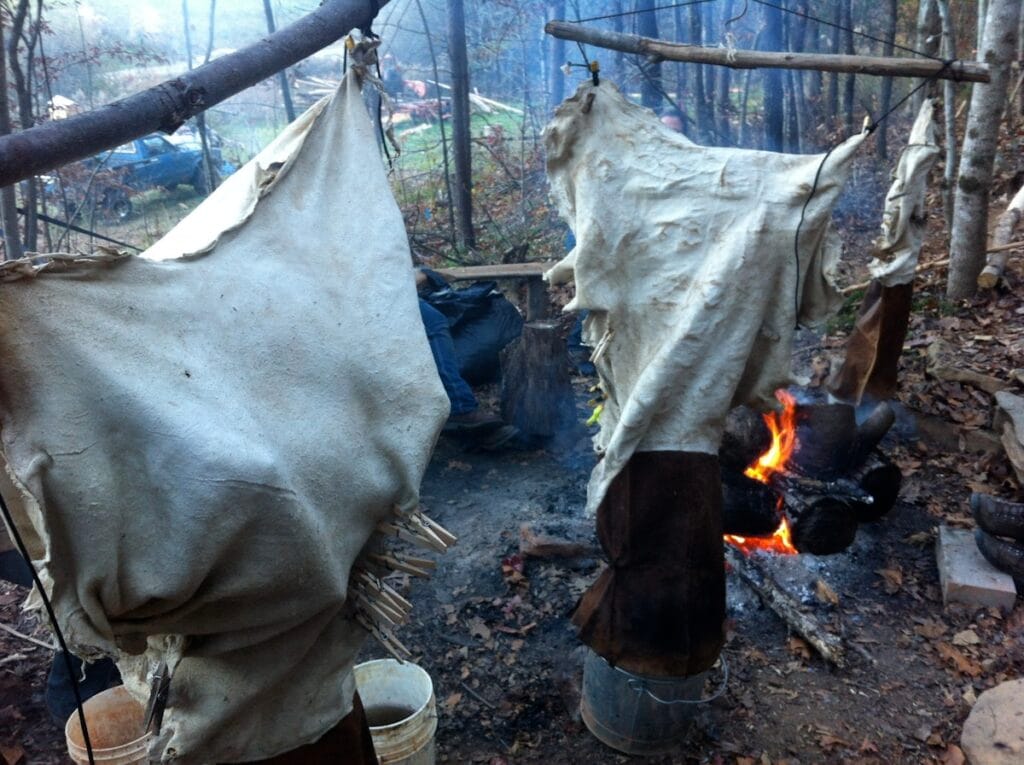
Use either an old wood stove, a metal can with holes poked in it, or a hole in the ground. Build a fire using nice hardwood for fuel. Let this fire burn for 30 minutes to an hour (or longer), so that a good-sized bed of coals accumulates. Transfer some hot coals into your wood stove, metal can or hole in the ground. At that point, add punky wood on top of those coals to create a lot of smoke.
Now, hang your hide and its cloth extension over those same coals so the smoke is channeled up into it. Allow the smoke to penetrate fully, which can take 30 minutes to 3 hours, then flip your pouch inside out and smoke the membrane sides of your hide.
Watch the video below for more instruction on smoking a hide.
Curious about our Online Hide Tanning Course?
We’ll let you know when classes open for registration, and send you our fun and informative newsletters.
When the smoke penetrates to the outside of the hide, you are done.
Congratulations, you’ve successfully learned how to tan a hide! You are officially a badass.
All of the videos in this post are excerpts from our Online Hide Tanning Course, which contains much, much more that what’s shown here. If you’d like more detailed video instruction, plus an illustrated course manual that’s over 50 pages, and an opportunity to ask questions and troubleshoot with Natalie, the course is for you.
We wish you well with your hide tanning endeavors, and hope that our guidance helps you along your way.
Frequently Asked Questions About How to Tan a Hide
For beginners, the wet-scrape brain tanning method is often the most approachable. It uses natural materials like brains or egg yolks and emphasizes hands-on techniques instead of harsh chemicals. Although learning how to tan a deer hide for beginners still takes time and muscle, wet-scrape brain tanning is a rewarding and sustainable way to start. Our Online Hide Tanning Course offers step-by-step guidance for new tanners.
Yes! Natural hide tanning methods like brain tanning allow you to tan hides without any synthetic chemicals. Instead of chemical baths, you use natural emulsified fats (found in brains or egg yolks) and processes like smoking to preserve the softness of the hide. Learning how to tan a hide without chemicals creates a beautiful, non-toxic material that stays soft and durable for years.
Tanning hides naturally is not a quick project. Depending on factors like the size of the hide, temperature, and your available time each day, the entire process usually takes between three days and two weeks. Some steps, like soaking and softening, require patience and repeated effort. If you’re new to how to tan hides, allow yourself plenty of time to go slowly and learn at each stage.
Brain tanning uses natural oils found in brains (or substitutes like egg yolks) to soften and preserve hides, while chemical tanning relies on harsh solutions like chromium salts. Brain tanning results in a softer, more breathable, and more natural product — perfect for those interested in how to brain tan a hide without introducing toxins into their work or the environment.
Smoking the hide is the final essential step in natural hide tanning. Without smoking, a brain-tanned hide will stiffen and harden when it gets wet. Smoking chemically alters the fibers, helping them stay soft even after exposure to moisture. It also gives the leather a beautiful amber color and adds extra durability, making it ideal for clothing, moccasins, and gear made from your finished buckskin.
 On Facebook
 On Instagram